Ugh, our household has been hit with the flu....it's been going around here in Hawaii as well as the mainland U.S. We'll be taking a couple of days off to hopefully get better really quickly!
We'll work on the Cauliflower recipes soon!
Take care of yourself...especially those in the really cold parts of the U.S.!
Thursday, January 24, 2013
Monday, January 21, 2013
Dukan Greek Chicken Stew (it's a Paleo - ish recipe too!)
 |
| Greek Chicken Stew |
We loved this recipe!
His only having a fruit smoothie and protein bar all day could have been the reason the male half of this couple loved this recipe. It was pretty good. This stew was perfect for us. Easy to make, tasty, light but it warmed us up during that cold, windy weekend.
We found this recipe while googling "healthy stew recipes" -- as soon as we saw how easy it was and it had cauliflower, we knew we had to try it. The male half loves cauliflower. Our finished dish did not look nearly as good as the photo on the NY Times site though. We left out the olives (male half doesn't like them and the author mentioned the salt content and we need to be a little more careful with our salt intake) and the feta cheese.
We also pulsed our tomatoes more than the author of the recipe did because the male half of this couple doesn't like chunky tomatoes. This recipe is both a Dukan recipe (Cruise, Consolidation and Stabilization) and is a Paleo - ish recipe. Use organic tomatoes and free range chicken to get closer to a Paleo meal. We found some Paleo people against vinegars and some use in moderation. This recipe calls for 2 T. which to us is not a whole lot.
RECIPE:
Serves: 2 if you're not having any starch (this actually could have been three servings, but as mentioned above, the male half only had a fruit smoothie and protein bar that day and I didn't want to leave one piece of chicken left on the pot -- I was stuffed and uncomfortable for a while after dinner -- note to self: save the one piece of chicken)
Prep Time: 10 minutes or so
Cook Time: 1.5 - 2 hours
1 T. extra virgin olive oil
1 red onion, chopped
4 cloves garlic, minced
6 - 8 boneless and skinless chicken thighs, some of the excess fat removed, rinse and pat dry (we used 6)
2 T. red wine vinegar
1 - 28 oz. can organic chopped tomatoes, with juice, pulsed in a food processor
1/2 t. cinnamon
sea salt and pepper to taste
1/2 t. dried thyme
2 cups cauliflower florets, sliced about 1/2" thick
1/2 T. dried parsley
The original recipe has you frying your chicken in a tablespoon of olive oil but we used our nonstick pan and fried the chicken without spray or using oil on the pan. Fry chicken over medium high heat, browning each side, in batches if necessary. Takes approximately 5 minutes on each side. Remove the chicken and place on a plate. Pour off any excess fat from the pan leaving the fried bits in the pan. Add vinegar to pan and scrape up all the bits from the bottom on the pan.
Add the olive oil and turn heat down to medium. Add the onion and a generous pinch of salt and cook, stir often and scrape the bottom of the pan until it begins to soften, about 5 minutes. Turn the heat to low, cover and let the onions cook for about 10 minutes, stirring from time to time until lightly browned and very soft. Add the garlic, stir together for about a minute, until the garlic is fragrant. Add the tomatoes and their juices, cinnamon, thyme, and salt and pepper to taste. Bring to a simmer and simmer 10 minutes, stirring from time to time, until the mixture is reduced slightly.
Return the chicken to the pot along with any juices accumulated on the plate. If necessary, add enough water to barely cover the chicken. We didn't need to add water. Bring to a simmer, reduce the heat, cover and simmer for 20 minutes. Add the cauliflower and simmer for another 20 minutes or until the cauliflower is tender and the chicken is very tender. We cooked ours about 20 minutes longer than the recipe recommended, it took a while for our cauliflower to cook. Stir in the parsley, taste and adjust seasonings.
We ate this as is, no starches or grains. We save the leftover tomato sauce in the pan for an omelet the next day.
According to the author of the recipe, the stew keeps for 3 to 4 days and freezes well. We ate all of ours but hope to make more!
Enjoy...we sure did!
Saturday, January 19, 2013
Product Review: XyloSweet by Xlear
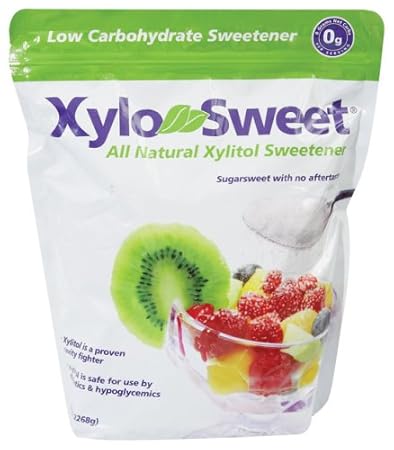 |
| Photo linked from Amazon.com |
We use Xylitol and Truvia in our kitchen -- we actually prefer Xylitol. It looks like refined sugar, it has worked well for us in baked and cooked items. When we were first introduced to Xylitol, we bought the Now brand. We liked the results -- but it's pricey, especially when baking. Using a teaspoon here and there for some of our Japanese stewed dishes isn't too bad, but when you start using cups at a time, that $11 - 2 lb. bag goes fast!
This past Christmas we made Candied Pecans. We used the last of our Now brand Xylitol for our sample batches with nice results -- they ended up looking like Glazed Pecans. Knowing we had to produce a lot of pecan batches, we decided to try the Xlear XyloSweet Xylitol to save some money. It's Xylitol in pure form and we've used the Xlear Nose Spray. This was a mistake. Well, let me say first, using this XyloSweet in things like our Chicken Hekka seemed to work just fine -- you really don't use much. However, when baking our Candied Pecans, the XyloSweet batch starts to burn within the first 15 minutes and when the glaze dried it looked like our glazed pecans but 5 weeks old! The batches made with the Now brand turned out perfect. We were able to bake the pecans the full hour, no burning and the glaze was beautiful -- even after a few days.
So, for that reason, we do not recommend this brand. Spend the extra money for another brand like Now.
Thursday, January 17, 2013
Dukan Persian Turkey Burgers (it's a Paleo recipe too!)
 |
| Persian Turkey Burgers |
We have mixed feelings about this one...
It was a little on the plain side but it's always nice to try something different. We went back to see if we did something wrong and we probably could have increased the amount of each spice since the recipe calls for 1 pound of meat and the ground turkey at Safeway only comes in 1.25 lbs -- we didn't want to save .25 lbs. of ground turkey, although we could have used it for something. It could also be because we used ground turkey instead of ground beef.

Anyway, we also didn't try any of the sauce recipes listed on the recipe page and the yogurt sauce would've been a good one to try with these burgers. So, this wasn't a bad recipe, the burgers were juicy, just not one that knocked our socks off because it was bursting with flavor. We'd definitely try this recipe again.
The nice thing about this recipe -- it fit both the Dukan and Paleo diets without any changes...well, except we didn't cook ours with ghee.
RECIPE:
Serves 3-4 (we ate it as a Cruise/Paleo meal, so with veggies only, no starch)
Prep Time: less than 10 minutes
Cook Time: 10-20 minutes
1 1/4 lb. ground turkey or 1 lb. ground beef
1 small onion, diced finely
1 egg
1 t. kosher or sea salt
1/2 t. black pepper
1/2 t. cinnamon
1/2 t. dried oregano
Mix all ingredients together in a bowl. Form patties (we made 8 small patties). Heat grill pan over medium. If you're on the Dukan Diet, spray your pan with a little bit of nonstick spray. If you're on Paleo, use your choice of fat. We lightly brushed on a small amount of extra virgin olive oil on our pan for the first round of patties and didn't need any additional oil for the second round of patties.
Cook patties until they are half cooked, then flip patties over and cook until done. We usually cook ours about 3-4 minutes per side or until there are no pink juices coming out of the patties.
We had ours with steamed broccoli. The leftovers were broken up into small pieces and made into a Persian Burger Scramble for my breakfast.
Monday, January 14, 2013
Dukan and Paleo Pulled Pork
 |
| Easy Pulled Pork |
We loved this recipe!
Ok, first of all, our first time on Dukan, we stayed away from fatty meats...hardly used our slow cooker. This time around, instead of just a 30 minute walk per day, we are trying to do 30-45 minutes of aerobic exercise which is why during Cruise, we weren't afraid to have pulled pork. I usually eat Pork Adobo once a week from a little Filipino shop near my work -- it's made with pork shoulder -- I discard all the fat and eat only the meaty pieces and I've lost almost half the weight I set out to lose. If you've still got a lot of weight to lose and you're not doing some sort of almost daily aerobic exercise, you may want to wait until Consolidation to try this recipe.
The first week of January it was rainy and windy here...almost every day. It seemed like the temperature was always 68 degrees when I checked my phone. So, Thursday, our usual 'meal planning' day, we pulled out a Greek Chicken Stew recipe and this Crock Pot Pulled Pork recipe. They were perfect for the rainy, windy and chilly weekend.
We found this recipe soon after we decided to start easing into the Caveman way of eating. Saved it and didn't intend to use it until we lost all our weight and truly eased into the Caveman diet. We couldn't wait :-) This recipe is very easy and very tasty -- oh and it's a lot for two people. We froze half the pulled pork and the other half we ate for two meals with no rice or bread.
 |
| Mix your dry rub. |
 |
| 1/2 the onions line the bottom of the crock pot |
 |
| Rub all your dry rub on your pork (before placing it in the pot of course) |
 |
| Place the rest of your onions on the top of your pork, cover crock pot and cook according to the directions below |
Serves: a lot (see paragraph above)
Prep Time: 10-15 minutes (we cut some fat from our pork shoulder)
Crock Pot Cook Time: 5-6 hours on high, then 3-4 hours on low
6 Qt. Crock Pot used
4-5 lb. pork shoulder/butt (some fat removed), rinse and pat dry
1-2 yellow onions, sliced (we used one)
Dry rub:
3 T. chili powder
1 t. coriander
2 t. ground cumin
2 t. onion powder
1 T. dried parsley
1/4 t. chipotle chili powder
2 t. kosher or sea salt
Mix all dry rub ingredients together, set aside. Rub dry rub all over pork. Be sure to use all the dry rub. We let our pork sit out on the counter for about 20 minutes. Line your crock pot if you have liners (they make clean-up so easy!). Place half your onions on the bottom of the crock pot. Place your pork in the pot. Place the remainder of the onions on top of the pork, cover and cook on high for 5-6 hours (we cooked it for 5 hours). Then cook for another 3-4 hours on low (we cooked it for 3 hours). After the 8 hours of cooking, we opened the pot, checked to be sure the pork was falling apart, then pushed the pork into the juice. Turn your pot to warm and cover to let the top part of the pork that wasn't in the juice to soak up some liquid.
In the meantime, prepare any veggies you will be having with your pork. Depending on which diet you're on and if you're not trying to lose weight, you can make a gravy with the drippings and use sparingly. We dipped our pork in the juice to add a little moisture...it was very tasty just like that!
Remove pork from crock pot, take two forks and shred pork removing fat as you go. We had this with sauerkraut and broccoli. Made an omelet with some of the leftovers and are considering lettuce wraps with the half we froze.
Enjoy...we sure did!
Saturday, January 12, 2013
Dukan Update
Hope everyone's doing well with their weight loss and healthy eating! We've been sticking to our healthy eating but I've plateaued....but I've also skipped exercising this past week. This weekend it's back to exercising and the male half of this couple and I have decided to have an "exercise together" night each week. We're still trying to figure out what we'll be doing -- we're looking for something free of course and something he won't become bored with.
This weekend there will also be not a lot of cooking in our house. The male half had his second to his last dental surgical procedure done -- so he can't really eat much. He's requested a non-Dukan and non-Paleo dish -- rice, since it's easy to mash in his mouth. I'm sure by next weekend we'll be able to make regular dishes.
This plateau has put a bump in my Dukan road. We're supposed to go into the Consolidation Phase next week -- late last year our plan was to transition to a Dukan/Paleo lifestyle once I got to my weight goal, but since I am not there yet, we'll be on Dukan for a little longer. I was so looking forward to adding my Candied Pecans made with Xylitol to my diet!
This time around I'm not feeling discouraged by a plateau or not reaching my goal...I know adding back aerobic exercise will get me there! We're hoping to get in a hike sometime this weekend -- will post photos if we do!
Friday, January 11, 2013
Dukan Rotisserie Chicken and Basil Rolls
 |
| Rotisserie Chicken and Basil Rolls |
The male half of this couple loved these!
Once a week the male half walks over to a little Vietnamese restaurant in Honolulu and picks up some tuna rolls...they are like Vietnamese Shrimp Rolls but with canned tuna instead of shrimp (he's allergic to shellfish). Unlike the shrimp rolls, the tuna rolls are usually served with a fish sauce instead of peanut sauce.
Before deciding to phase out grains, we bought a 6 pack of these brown rice wrappers (see our post). We had some leftover Rotisserie chicken and I knew I had to present it differently or the male half would give me that look....the "I need variety" look. Put these down in front of him and got no complaints!
 |
| Spinning dried wrapper in water -- we recommend you use two hands |
 |
| Place chicken and basil in the center of the wrapper. |
 |
| Fold left and right sides in, snug, but be careful not to pull too tight |
 |
| Pull bottom edge over chicken, tuck gently under and start rolling. I usually use two hands to ensure an even roll, but I was taking photos at the same time. |
RECIPE:
Serves 1
Prep Time: less than 10 minutes
Roll Time: less than 10 minutes
Sauce: took a couple minutes to prepare
1/4 of the sauce recipe from our Vietnamese Patties -- this was too much for the male half of this couple, he doesn't like to use a lot of sauce for anything he eats
a heaping cup of shredded rotisserie chicken (nuked ours in the microwave until it was nice and hot)
2-3 basil leaves, sliced thinly
2 Happy Pho Brown Rice Spring Roll Wrappers
1 plate or shallow bowl of warm water
flat, clean surface to lay your wrappers on
If we had bean sprouts, the male half would have liked these even better. You can add a lot of different veggies or meats in your rolls.

Serve as is or cut into pieces with the fish sauce. Try to wrap your rolls close to the time you are going to eat them...leaving them in the refrigerator will eventually make the wrappers hard and not very nice tasting.
Enjoy...the male half did!
Thursday, January 10, 2013
Celebration Meal: Baked Whole Wheat Rigatoni
 |
| Baked Whole Wheat Rigatoni |
Happy (few weeks after his) Birthday to the male half of this couple!
One of his favorite foods when he lived on the mainland was Baked Ziti...there was a woman who ran a restaurant near his work and once a week he would go in for her Baked Ziti. He claims it was inexpensive and the best Baked Ziti ever...he had it so often when she saw him walking towards the restaurant she would start making his plate!

RECIPE:
Serves: 6 to 8
Prep Time: 15-20 minutes
Cook Time: 20-30 minutes or until cheese is bubbling
1 - 40 oz jar of Victoria All Natural Marinara Sauce
16 oz. whole wheat rigatoni, cooked until not quite al dente
1 - 15 oz. tub of low fat ricotta cheese
up to 1 1/2 lb. mozzarella cheese, grated
1/2 c. romano cheese, grated (we used the one that looks like powder -- you can use parmesan, but we prefer the taste of romano and there's less fat)
1 whole egg
salt and pepper
Start cooking your pasta. Preheat oven to 375 degrees Fahrenheit. Prepare your baking pan, we used a 9x13 pan lined with foil because I don't like scrubbing pans. In a large bowl, mix ricotta cheese, 2 cups of the mozzarella, romano cheese, egg, salt and pepper to taste. Stir together a couple of times (do not mix completely). When draining your pasta, rinse under cool water to stop the cooking process. Drain completely. Pour pasta into your cheese mixture and toss to slightly combine (there should still be large lumps).
Add your marinara sauce to the cheese/pasta mixture. Toss to combine. Add half the coated pasta to your pan. Top with half the remaining mozzarella cheese. Add the rest of your coated pasta to the pan and cover with the rest of the mozzarella cheese. Bake for 20-30 minutes or until bubbling. Remove from oven and let stand 5 minutes before serving. (if you have fresh parsley, you can sprinkle that on your finished pasta)
Enjoy...we sure did!
Wednesday, January 9, 2013
Dukan Stir Fried Shirataki Noodles
 |
| Stir Fried Shirataki Noodles |
We loved this recipe!
We didn't use the Shirataki Tofu noodles, we just used regular shirataki noodles which to us are still Dukan friendly and low carb. This was a nice light side dish to go with our beef hekka...the male half who doesn't care of Shirataki Tofu noodles used as a substitute for pasta actually liked this!
The great thing about shirataki noodles -- we both never feel bloated after we eat it -- we usually feel bloated after eating regular pasta. Shirataki noodles are Dukan friendly and we found a Paleo - ish recipe for Fried Shirataki noodles -- although it does state that some wouldn't agree on shirataki being allowed.
Another, light and healthy dish to start of the new year!
 |
| Slice up cabbage, regular cabbage works too. Bean Sprouts can be added or substituted as well as other veggies. |
 |
| In a dry, hot wok or pan, stir fry your noodles to remove moisture |
 |
| Remove noodles from pan and add veggies, stir fry until soft, but not too soft! |
 |
| Add meat (optional) and stir fry, we would slice the meat thinner than this. Your meat will heat faster and less chance for it to dry out. |
RECIPE:
Serves 2-4 (if we had this on its own, we probably could have finished the entire wok of noodles)
Cook Time: 15 minutes or so
2 - 13 oz bags of shirataki noodles (I'm sure the Shirataki Tofu noodles would work too)
1-2 cloves of garlic, minced
6 pieces of won bok (Napa cabbage), sliced
a handful of sliced shiitake mushrooms, soak them in water first if yours are dried
2 slices of left over Rump Roast (optional, but if you do use the leftovers, it may be dry, try to cut the leftover roast into thin slices so you don't have to cook it long to heat it)
1 - 2 t. sesame oil
2 T. Gluten Free Tamari, low sodium soy sauce or Bragg's Amino Liquid - depending on which diet you are on
 Rinse and drain noodles. Over high heat and in a dry wok or pan, stir fry your noodles to dry out your noodles out. We fried ours in two batches. Place the dried, fried noodles in a dry colander. Spray your wok with a little non-stick spray or olive oil if you're on the Paleo diet, stir fry garlic until fragrant. Add veggies and stir fry until soft. Add meat and stir fry until heated through. Add noodles back to pan and stir everything up. Add tamari (or soy sauce or Bragg's) and 1 t. of the sesame oil. Stir and taste. If you need more tamari/soy sauce or sesame oil, add a little more. Be careful not to add too much sesame oil, a little goes a long way and too much can be overpowering...not to mention, it's oil!
We added a handful mizuna (another green) but it's optional. Bean sprouts would have been great with these noodles also!
Enjoy...we sure did!
Monday, January 7, 2013
Dukan Rump Roast (it's Paleo - ish too!)
 |
| Juicy Rump Roast |
We loved this recipe!
The male half doesn't like to eat much meat these days, but he really enjoyed this rump roast. As we combed the internet for Paleo recipes, we saved the Domestic Man's Perfect Eye of Round Roast recipe. Wow, lean, inexpensive meat can be tender? Yes, it can -- but the leftovers weren't as tender as the first meal we had from the roast.
We actually ended up with a Rump Roast -- couldn't find Eye of Round at any of the markets near us, only round steak but it was only about a pound. We made two mistakes -- the first being we opened the oven because our roast fell over in the pan and the second being we took the roast out 10 minutes early -- so, our roast was a little underdone. We bought a meat thermometer...but a cheap one and it's going in the trash since it didn't work :-( The other issue with our oven is, it's our landlady's oven and it's probably as old as me or older -- it cooks unevenly, it's hard to bakes cakes or anything in that oven. We turned the oven back on after realizing it was undercooked and followed the Domestic Man's instructions of 325 degrees Fahrenheit for 10 minutes and cooked it to a medium rare (which is what I like).

We'll probably try this again. It wasn't fatty, it was tender and juicy...but as mentioned earlier, the leftovers ended up well done and tough. So, if we do try this recipe again, we'll make it when we have company over. It was a nice comfort type food to have without it being super fatty. We made a gravy with the pan drippings, cornstarch and water because we were worried the roast would be dry - but in our opinions, it really didn't need it. The seasoning on this roast and the juiciness was just perfect.
We're classifying this recipe as a Dukan and Paleo - ish recipe since we didn't use grass-fed beef.
We ate about half of the roast. The male half had his with mashed potatoes and I had it as a pure protein meal. The other half we used in a frittata and a stir fried shirataki noodle dish -- recipes to come. Next time we'll try adding some carrots to the pan.
RECIPE:
Serves 4-6
Prep Time: 35 minutes
Cook Time: 7 minutes per pound plus 2.5 hours with the oven off
2-8 lbs. rump roast or eye of round roast (we used 2.5 lbs)
1 t. kosher salt
1 t. black pepper
1/2 t. dried thyme
6 cloves garlic, minced
Mix together your seasonings then rub all over your cleaned roast (rinse and pat dry). Leave your roast sit out for 30 minutes to allow it to come to room temperature before cooking. Preheat your oven to 500 degrees Fahrenheit. We don't have a roaster or a dutch oven, so we put our roast in a 9x13 baking pan lined with foil. Place your roast in the oven and bake for 7 minutes per pound -- ours came out to 17.5 minutes. Then turn the oven off and do NOT open the door. Leave your roast in the oven for 2 1/2 hours -- if you follow instructions (not like us), your Eye of Round or Rump Roast should be perfectly cooked.
Take the roast out of the oven and use a meat thermometer to check the temperature, it should read between 130 and 150 degrees. If it doesn't, do what the Domestic Man recommends and put it back in the oven at 325 degrees Fahrenheit for 10 minutes and check it every 10 minutes until it reaches 130-150 degrees. Place your finished roast on a cutting board or plate and cover with foil and let it rest about 10 minutes before carving.
The Domestic Man says you can also roast the meat at 170 degrees for 2 1/2 hours. Just remember, like our old, falling apart oven, results will most likely vary.
We had enough pan drippings to make some gravy with cornstarch but it wasn't necessary. I had this by itself since I'm in the Cruise Phase of the Dukan Diet and it was my PP day. The male half had his with broccoli since he's not trying to lose weight and he can do a PV day everyday.
Enjoy...we sure did!
Sunday, January 6, 2013
Product Review: Happy Pho's Vietnamese Brown Rice Wrappers

These brown rice wrappers were pretty good. Not as soft as the regular white ones...kinda chewy even after wetting them twice. Definitely a healthier alternative to the regular white ones.
Side note: we purchased a pack of 6 of these on Amazon.com before we decided to phase out grains...we'll probably use them once in a while, maybe give away a couple packs and hold the rest in the refrigerator for Paleo cheat days or Dukan Consolidation Days (not a cheat...well, depends on what you put in your wrap).
 |
| Wetting brown rice wrapper |
We've worked with the regular Vietnamese white rice wrappers or bánh tráng in the past, it can be tricky to work with but once you've made a few, it's pretty easy. With the white rice wrappers, you can usually hold with both hands and roll the egde in the water, almost like a pinwheel once or twice and it'll be wet enough. With these brown rice wrappers, I ended up "rolling" the wrappers 2-3 times in order to soften them enough. One of our Vietnamese friends taught us how to use these wrappers while at a Vietnamese restaurant.
After a little practice you'll find the right amount of firmness and gentleness required to handle these delicate wrappers.
We have one recipe to post -- made a couple rolls using some leftover rotisserie chicken we had for the male half of this couple. Like sushi, you don't have to use only traditional ingredients in these wrappers. Be careful not to use items that are too wet or your wrapper will end up ripping. You can make a Korean wrap using korean banchan or prepared vegetable dishes, soba noodles if you're not on the Paleo diet, etc. I've been thinking about making some poke rolls for the male half of this couple soon too.
Enjoy!
Saturday, January 5, 2013
Follow Us On....
Finally made some time to add "follow us" buttons for Twitter and Pinterest. Whatever's your pleasure! We haven't created a Facebook page yet, but we probably will do that this year.
You'll find the Twitter and Pinterest "follow" buttons in the right hand column (near the top) of our blog. We also moved our "search this blog" function to the top since that's one of the first things we do when we come across a new recipe blog.
You can still follow us by email...follow us whichever way is easiest for you!
If you have any suggestions or comments on how we can make our blog easier for you to use, please email us at hapacouple@gmail.com or leave us a comment on this post. We can't promise we'll know how to implement the improvement, but we will certainly try!
Thank you for visiting and following our blog!
Dukan Riceless Temaki (Sushi Handrolls)
 |
| Riceless Temaki Sushi Handrolls |
We loved this recipe...and you can use a lot of different ingredients to make a temaki or handroll and they are very easy to make once you get the rolling/tucking technique down.
We don't recommend anything too wet that may soak through your nori or seaweed wrapper.
Ever since I can remember, my grandmother (and later all the female grandchildren) always rolled makizushi for New Year's Eve (and Day) -- a traditional "round" roll and we always used an odd number of ingredients for good luck. Our makizushi usually consisted of sliced shiitake mushrooms, kampyo (strips of dried gourd reconstituted in the same water you boiled the shiitake mushrooms), egg omelet cut into strips, unagi (eel), dried ebi (shrimp) -- both colors -- red and green and carrots.
This year we didn't make sushi -- we knew we would most likely eat just one piece if we did make sushi. So, on New Year's Day we decided to make some Riceless Temaki Handrolls with nori (seaweed wrapper), poke (seasoned raw fish) and an egg omelet made with tobiko or fish eggs. You can really use a lot of different ingredients in a handroll. We have lots of tobiko in our freezer and it was a PP day. If it were a PV day, we would have definitely added either cucumbers, sprouts, seasoned lettuce, enoki mushrooms or other veggies. Other items you can use - our kamaboko dip (recipe coming!), imitation crab, etc.)
 |
| Nori -- Seaweed wrap |
 |
| Nori cut in half for handroll, front piece is the shiny side, back piece is the ridged side. |
 |
| Place your omelet piece down at an angle facing the left |
 |
| Place some poke on the omelet |
 |
| Pick up the nori and hold in your left hand, use your right hand to push left bottom corner up and start to tuck under the right side of the omelet. |
 |
| Keep rolling and tucking carefully. It's one of those -- be firm but gentle. Too firm and you'll smash everything up, too gentle and your handroll will be too loose. It may take you a couple of tries, but almost anyone can learn to make a handroll! Don't give up! |
RECIPE:
Makes 4 handrolls
Prep time: 10-20 minutes
Roll Time: once you get the hang of it, rolling won't take long at all
1/8 lb. Ahi Limu Poke (Seasoned raw tuna with seaweed)
1/8 lb. Salmon Poke (Seasoned raw salmon)
2 full sheets of nori cut in half
2 eggs
1 T. tobiko (fish eggs) - this is optional, these are usually on the salty side for us, so we didn't add anything else to the eggs, but if you're making just a plain omelet or some other kind of omelet, you may want to season it -- even with hot sauce if you'd like
Beat eggs in a bowl (be sure to get some air in there!). Add tobiko and mix. Fry omelet in a pan over medium heat -- cook they way you like them. We don't like our eggs runny, so we usually cook them a little more well done. We used non stick spray in our pan but if we were making a true Paleo meal, we probably would have used a little bit of bacon grease or a small amount of olive oil.
Remove egg from pan and cut into 4 pieces (see photo above). If your egg is longer than the nori wrapper, fold your egg.
We rolled two handrolls at a time for the photo taking session but normally we roll one at a time and we usually lay all the ingredients on one plate and roll as we eat...this way your nori doesn't get soggy -- it ends up chewier and for us, a little more difficult to eat. If soggy nori doesn't bother you, go ahead and wrap them all before eating...it's really up to you.
Place your egg on the left side of the nori, angled to the left. Place some poke on the egg. Pick up your nori carefully and hold in your left hand (see photo above). With your right hand, start rolling and tucking the left bottom corner of your nori under the egg. Keep rolling and tucking until you have just the bottom right corner of the roll sticking out. Dab a little water on the corner and close your sushi.
As mentioned above, rolling sushi is one of those things where you have to have a firm, but gentle touch. Too firm will smash everything and too gentle will result in a loose handroll that will fall apart with the first bite or sooner. Practice before you roll for a party! Handroll parties are fun too!
Enjoy...we always do!
Friday, January 4, 2013
8 Of Our Favorite Attack Recipes
 |
| Dukan Chopped Steak
We are trying to clean up our recipe blog. We finally got our "Poultry" page under "Recipe Categories" fixed, but can't seem to get the pork and beef page fixed. We're hoping to get some Attack, Cruise, Consolidation, and Paleo recipe pages up to make it easier to view and find recipes.
|
If you are new to Dukan or starting over like we did a couple times or just needed to add in a couple Attack days after a vacation or holiday, below are some of our favorite Attack Dinner/Lunch recipes. The very first time we tried the Dukan Diet, we lasted a day or two. We didn't do any planning and Attack is really the phase we needed to have planned out. We also tried to eat just deli meats, yogurt, strips of chicken and beef. Oh man, it was rough!
As we successfully made our way through to Consolidation, we got better at meal planning and the next time we had to go on Attack we really dug deep to Dukan some our of favorite recipes so we could actually have meals instead of just snack type foods during Attack. That's where the recipes below came in -- yay! Most of these recipes are simple and easy to make.
You may have noticed we haven't baked much or made any kinds of desserts. The later half of our first successful Dukan run, the sugar cravings went away and by the time we went through the diet again, we really didn't need things like our Dukan Chocolate Oat Bran Muffins to satisfy our sweet tooth!
Eventually we will make more desserts, but for now, we're perfectly happy filling up on meats, fishes and veggies!
Dukan Chopped Steak
Dukan Shoyu Chicken
Dukan Fish Moco
Dukan Curry Turkey Burgers
Dukan Turkey Herb Meatloaf
Dukan Chicken Adobo
Dukan Garlic Dijon Herb Salmon
Dukan Japanese Roll Ups (with konnyaku and no veggies)
 |
| Dukan Shoyu Chicken |
 |
| Dukan Fish Moco |
 |
| Dukan Curry Turkey Burgers |
 |
| Dukan Turkey Herb Meatloaf |
 |
| Dukan Chicken Adobo |
 |
| Dukan Garlic Dijon Herb Salmon |
 |
| Dukan Japanese Roll Ups |
Dukan Chicken Hekka
 |
| Chicken Hekka |
Another healthy recipe! This recipe was ok -- but let us explain!
Chicken Hekka is something the female half of this couple grew up on. I believe it was first cooked during the Hawaii Plantation days...fast, easy, nutritious, inexpensive, etc. I've never seen Hekka on menus in Japan. Back to our explanation -- our family ate Chicken Hekka at least once a month...sometimes more. It was made with chicken thighs, canned bamboo shoots, canned button mushrooms and canned shirataki noodles (not tofu shirataki, but regular shirataki noodles. When on sale, most of these ingredients were fairly inexpensive and you ended up with leftovers. You can add other things like won bok (Napa Cabbage), other greens and you can even use beef although we never did.
Instead of making Hekka they way my family's made it for years, I decided to try someone else's Hekka sauce recipe and hindsight, I should have known it would be too salty for us...it called for a LOT of shoyu or soy sauce. Actually, I do not have a recipe per se for Hekka -- we always, threw the chicken pieces in our wok, stir fried it, add the veggies, stir fried, then added soy sauce (you know, eyeballing it) then a little sugar (again, eyeballing it and of course, tasting it to see if we got the taste down).
 We'll leave it up to you if you want to try this recipe. We watered down the sauce significantly and it actually tasted better two days later when we used the sauce to cook beef and bamboo shoots.
 We're classifying this recipe as a Dukan recipe even though it has a tablespoon of sake in it...we actually never used sake in our family hekka so you can leave it out if you like. We're also considering this a Paleo - ish recipe since we used Tamari Gluten Free Soy Sauce (still have to transfer my two bottles of Bragg's Amino Liquid to the male half's house). We're not sure if water chestnuts and bamboo shoots are on the Paleo or Dukan list, but it was a healthy dinner and I ended up dropping some weight this weekend!
RECIPE:
Serves 2 - 4 (two if you're in Cruise or on the Paleo diet and eat this by itself, 4 if you're in Consolidation and are having some sort of whole wheat starch)
Prep Time: 10-15 minutes
Cook Time: approx 20 minutes
1.25 lbs of chicken thighs, cubed (we would have just used 1 pound but we were in the Japanese market and they had chicken thighs cut up to make karaage or Japanese fried chicken so we bough the precut pack and removed as much fat as we could.
2 bamboo shoots, sliced (try to use fresh, we had canned ones on hand and wanted to use up)
1/2 can water chestnuts, sliced (optional)
8 pieces of won bok or Napa Cabbage or a similar green, sliced into small pieces
1 pkg. shirataki noodles (or tofu shirataki noodles) - depending on how strict you are on Paleo, you can omit the noodles if you aren't including these in your diet
a handful of mizuna cut into 2 inch pieces (optional, it was on sale this week)
1/2 c. Reduced Sodium Tamari Gluten Free Soy Sauce or Bragg's Amino Liquid (this was too salty for us - we ended up adding in about 2 - 2/12 c. of water, so you may want to start with 1/4 c. or less until you find a taste you like)
1 T. sake (optional)
1-2 T. natural sweetener (we used xylitol, although some Paleo peeps wouldn't agree on the use of xylitol), taste as you add
2 T. green onions, chopped
Other items you can add: shiitake mushrooms (sliced), button mushrooms (whole or sliced), tofu (if you're not on the Paleo diet), etc.
Mix Tamari (soy sauce or Bragg's Amino Liquid) with the sake and natural sweetener in a bowl -- see note above, start with small amounts of your soy sauce choice or else you may end up adding a lot of water like we did.
Depending on which diet you are, you can use non stick spray (Dukan) or a little bit your choice of fat if you're on the Paleo Diet -- to your pan over medium high heat. Add chicken to pan and stir fry until 30% cooked. Add veggies to your pan, cook until soft (usually just a couple minutes). Add shirataki noodles, mix. Add sauce, mix and let simmer for about 10 minutes or until chicken is cooked.
Serve as is for a Dukan Cruise meal or a Paleo meal or with brown rice if you're in Dukan Consolidation. We ate this as a Dukan Cruise/Paleo - ish meal so it fed just the two of us for one meal.
NOTE: We kept the leftover sauce and used it for a throw together Beef Hekka the next night.
Enjoy...we sure did!
Wednesday, January 2, 2013
Dukan Cedar Wrapped Salmon
 |
| Cedar Wrapped Salmon - Can't remember why we didn't take a photo of the salmon on a plate |
If this is your first time to our blog and you've been led here after a Google search on the Dukan or Paleo diets, welcome! We hope our recipes help in your health goals for the rest of your life :-) We have to admit, New Year's Eve (a big eating day here in Hawaii and probably many other places around the world) we cheated. Of course, gained some weight due to the cheating but yesterday we managed to get back on the healthy eating horse and not cheat one bit. We're pretty surprised. The first time we started the Dukan diet, after a cheat meal, it was SO HARD to eat healthy again. After cheating on New Year's Eve, we discussed the weight gain we would both experience, came to terms with it and vowed to eat a strict PP diet the next day. If we can do it, so can you! Good luck!
On with the recipe...we have some recipes from the end of the year to post, a couple of them would be classified as Celebration Meals, but we'll start out with a recipe that is not only Dukan Cruise but Paleo - ish too.
We loved this recipe!
We're not really into smokey flavors, but once in a while we enjoy something like this. This reminded us of a dish we had in Cowichan on the island of Vancouver, BC. We really didn't put much thought into this dish...it was a last minute decision. The day before we were at the poke (seasoned raw fish) counter buying poke for our lunch when we spotted these Fire and Flavor Cedar Wraps. We did a double take, thought it would be interesting to try but wanted to research if something like this could be used during Dukan. Well, we didn't find anything specific to Cedar Wraps, so the next day (Christmas Eve), after work we dashed into the grocery store and bought one pack.

They are easy, easy to use. You soak them for about 10 minutes in water, then wrap whatever you want to grill or bake in the wrap, tie with the string provided and you're ready to cook. For our first try, we decided to bake salmon in the oven. It was a PP day, so no veggies were added. Our salmon for the most part came out moist (except for the edges -- we cut our salmon too large). After we wrapped the salmon, we realized we forgot to add dill, but oh wells, next time. We have four more wraps from this package -- not sure if we'll do an Asian Salmon or a chicken in the last four wraps.
As the male half of this couple put it, if you're not into smokey flavors, it's nothing to get excited about but it did provide something different for us to eat. This was a very mild flavored dish...we didn't want to overpower it with seasonings -- we wanted to taste the cedar the first time around.
We are classifying this recipe as a Dukan and Paleo - ish recipe.
NOTE: We've never used Cedar Planks, so we can't comment on whether the convenience of the wraps are worth not using Cedar Planks.
RECIPE:
Serves 2-4 (two if you're in Cruise or on the Paleo Diet, four if you're in Consolidation and not on the Paleo diet)
Prep Time: 10 minutes to soak the wraps and about 10 minutes to prep and wrap your food
Bake Time: 15-20 minutes at 350 degrees Fahrenheit, depending on how thick your salmon pieces are
4 pieces of salmon (wild caught if you're on Paleo), in total ours weighed about 1 lb
salt and pepper to taste
olive oil
lemon slices and fresh lemon juice (4 slices, one for each piece of salmon, plus lemon juice to squeeze on your salmon)
If you have fresh dill (or even dried dill) you may want to sprinkle some on. We wanted to try it with dill, but forgot to add it on the salmon.
Soak your wraps in water for 10 or more minutes. Be sure to keep them submerged. In the meantime, rinse and pat dry your salmon. Dab a little olive oil on both sides of your salmon. Salt and pepper your salmon. Let sit for 5 minutes. Squeeze a little fresh lemon juice over your fish -- we seasoned both sides of the salmon. Preheat oven to 350 degrees Fahrenheit. Wrap each salmon in a cedar wrap and tie (directions are provided). Place in pan (we used a foiled lined pan for easy clean up) and bake for 15-20 minutes or until salmon is cooked through.
If you're adding veggies to your wrap, place them on top of your fish or chicken or whatever you decide to wrap.
Enjoy...we sure did!
Subscribe to:
Posts (Atom)